
diy fabric curtain tie backs for window decor can be the quickest way to make “okay” curtains look intentional, especially when panels feel bulky, block light, or just hang flat.
If you have ever tried to style a window and ended up with fabric puddling awkwardly or a room feeling darker than it should, tie backs fix that with almost no commitment. You can open the view, shape the drape, and add a small accent color without changing the whole curtain setup.
The catch is that not every tie back works for every fabric or rod height, and some “cute” designs slip all day. Below, you’ll get a few reliable DIY options, a simple sizing method, and some realistic troubleshooting so you do not waste an afternoon.
What makes curtain tie backs look “right” (and why some don’t)
Most tie-back fails come down to proportion and grip, not creativity. If the tie back sits too high, curtains look pinched. Too low, the fabric balloons and drags.

There are also a couple physics realities that matter more than people expect:
- Fabric weight changes everything. Velvet, blackout, and lined panels need wider tie backs or extra friction to prevent slipping.
- Rod-to-wall distance affects the “wrap.” If your rod brackets sit far from the wall, you need a longer tie back to go around the bulk.
- Placement impacts light. Tie backs can lift curtains off the glass, which often brightens a room more than swapping bulbs.
According to The Spruce, curtains are typically hung higher and wider than the window to create a fuller, taller look, and tie-back placement needs to respect that overall proportion.
Quick self-check: choose the right DIY approach for your window
Before you cut anything, figure out what you actually need the tie backs to do: hold heavy fabric, add décor, or simply keep panels off a heater vent. This quick checklist helps you pick a design that behaves.
- My curtains slide loose easily: pick a wider fabric band, add interfacing, or use a hidden elastic section.
- My panels are sheer/lightweight: you can use narrower ties, bows, or braided strips without sagging.
- I rent and can’t drill: consider a tie back that loops around the curtain itself, no wall hook required.
- I have kids/pets: avoid long dangling cords, keep ends short, and skip beads that could become a hazard.
- My window is near a baseboard heater or vent: choose a snug hold so fabric stays clear of airflow and heat.
If you are aiming for diy fabric curtain tie backs for window decor that look neat all day, your “hold strength” matters more than the bow shape.
Materials you’ll actually use (plus smart substitutes)
You do not need a craft room. Most tie backs can be made from scraps, an old shirt, or leftover curtain hem. Here’s a practical shopping-and-substitute list.
- Fabric: quilting cotton, linen blend, canvas, denim, or upholstery offcuts
- Interfacing (optional): adds body so ties don’t collapse
- Notions: thread, safety pins or clips, measuring tape, iron
- Closures (pick one): hook-and-loop, snaps, buttons, D-rings, or simple knots
- Wall option: screw-in hook or tie-back knob (if you can drill)
Substitutes that work surprisingly well: wide ribbon for light curtains, an old belt for thick panels, or braided fabric strips for a casual look.
3 DIY fabric tie-back styles that look finished (not crafty)
These three are the most forgiving. They scale up for heavy drapes and still look clean on small windows.
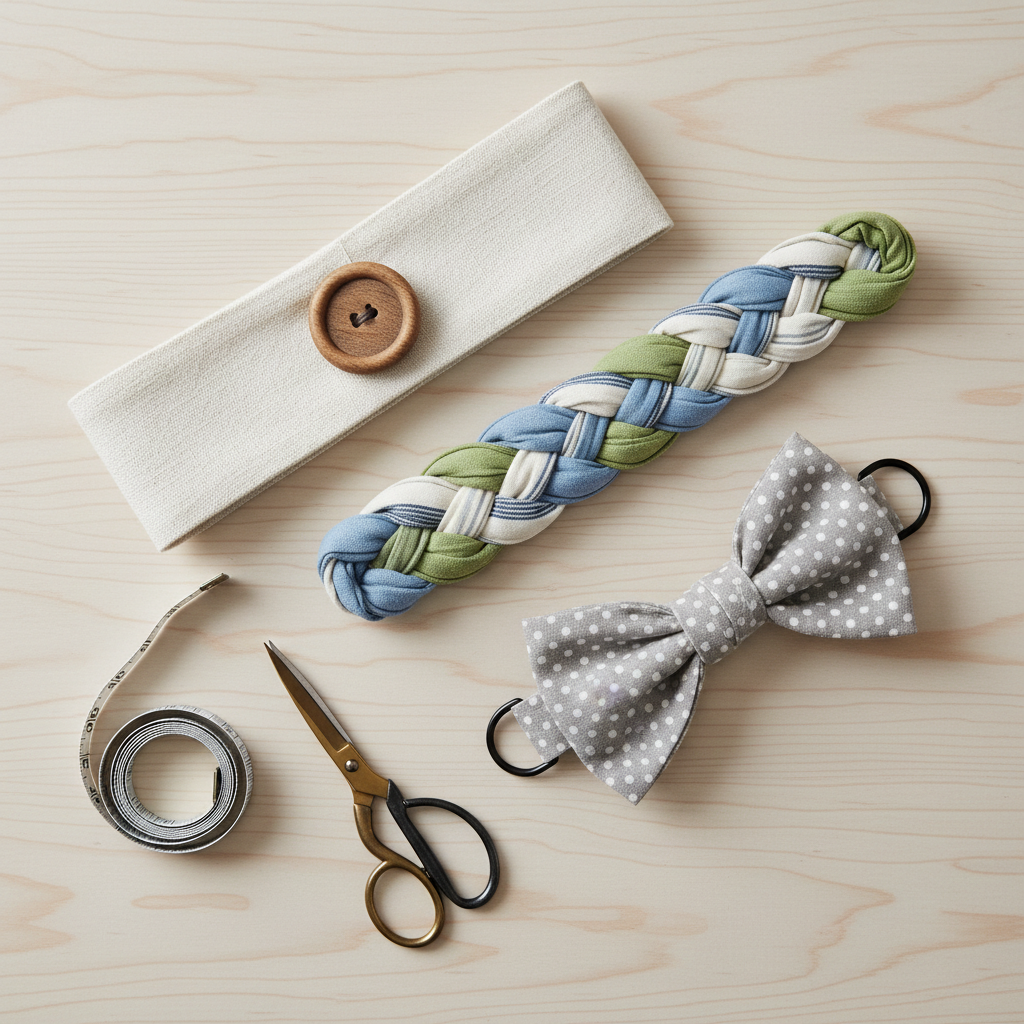
1) Wide fabric band with a hidden closure
This is the “stays put” option. It reads like a tailored accessory rather than a ribbon.
- Cut a strip about 4–6 inches wide, length depends on your curtain bulk (you’ll measure in the next section).
- Fold lengthwise right sides together, sew, turn, press.
- Add interfacing if fabric is floppy.
- Close with hook-and-loop or snaps so you can remove it for washing.
Where it shines: lined curtains, blackout panels, living rooms where you want a crisp look.
2) Braided fabric tie (soft, casual, great for farmhouse)
If you want texture, braid three long strips. The braid increases friction, which helps stop slipping without hardware.
- Cut three strips, press edges inward, topstitch (or use knit fabric that won’t fray much).
- Braid, then stitch the ends down and finish with a small wrap of fabric.
- Tie in a simple knot, or add a loop-and-button so it’s consistent every time.
Where it shines: casual spaces, kitchens, kids’ rooms, cotton or linen curtains.
3) Bow tie-back with D-rings (adjustable and tidy)
This is a good compromise when multiple people open and close curtains and you want the tie-back length adjustable.
- Sew a long strap, thread one end through two D-rings, stitch that end down.
- Wrap around the curtain, thread the free end through both rings, then back through one ring to lock.
- Add a decorative bow at the front if you want it more “window décor” than “utility.”
Where it shines: high-traffic rooms, heavier panels, anyone who hates re-tying knots.
Measure once: a simple sizing method (with a cheat table)
Here is the method that avoids guesswork: gather your curtain where you want it tied, then wrap a tape measure around that bundle with light tension. Add a little extra for seams and closure.
- Step 1: pick placement, usually around the lower third of the curtain height.
- Step 2: pinch the curtain into the shape you like, not super tight.
- Step 3: wrap measuring tape around the bundle and note the number.
- Step 4: add 2–4 inches for overlap/closure, plus seam allowance if sewing.
| Curtain type | Typical wrap length (around bundle) | Recommended tie-back width | Closure suggestion |
|---|---|---|---|
| Sheer panels | 10–14 in | 1.5–2.5 in | Bow or button-loop |
| Medium-weight cotton/linen | 14–18 in | 2.5–4 in | Button-loop or D-rings |
| Blackout/lined | 18–24 in | 4–6 in | Snaps or hook-and-loop |
If you are doing diy fabric curtain tie backs for window decor purely for looks, you can go a bit slimmer. If you want them to function daily, err wider.
Installation options: with hooks, without hooks, and no-drill workarounds
How you “anchor” the tie back is what decides whether it stays consistent. There are three common setups.
Wall hook (most stable)
- Mark the placement with painter’s tape and step back to check symmetry.
- Install hooks into a stud when possible, or use a wall anchor rated for your wall type.
- Keep both sides at the same height, even if the window trim is slightly off.
According to This Old House, choosing the right wall anchor matters because drywall needs anchors designed for the load and application.
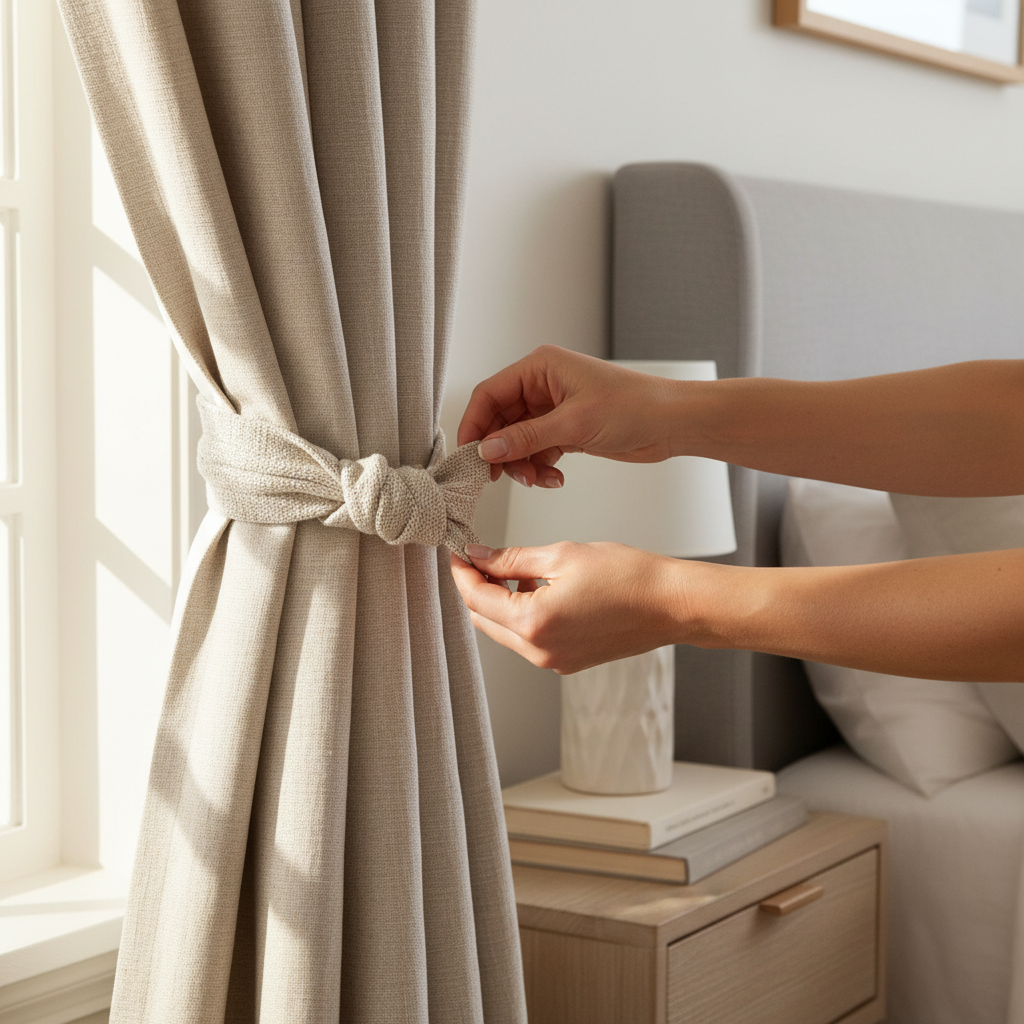
No-hook wrap (renter-friendly)
- Use a tie back that wraps the curtain and connects to itself (snaps, buttons, D-rings).
- Place it slightly tighter than you think, fabric often relaxes after a few minutes.
Magnetic option (quick, but not for every fabric)
Some DIYers sew small magnets into fabric ends. This can work on light-to-medium curtains, but magnets may not hold thick, lined panels. Also keep magnets away from small children and pets, and if you have medical devices in the home, it may be worth checking with a professional for safety guidance.
Common mistakes (and small fixes that save the project)
Most issues are fixable without starting over. Here are the ones I see most often when people try diy fabric curtain tie backs for window decor.
- Tie backs slide down slowly: widen the tie, add interfacing, or stitch a small hidden elastic segment on the inside.
- The curtain looks “choked”: move the tie back down 2–4 inches, or loosen the wrap slightly.
- One side looks different: the window frame may be off-level, measure from the floor instead of the trim.
- Wrinkly ties: press with steam, or choose a more structured fabric like canvas.
- Ends fray after washing: finish edges with a zigzag stitch, bias tape, or pinking shears.
Key takeaways before you start cutting
- Pick function first: heavy curtains need width and grip, not tiny bows.
- Measure the curtain bundle, not the window: your wrap length depends on fabric bulk.
- Renter-friendly is doable: self-closing ties (snaps, buttons, D-rings) avoid drilling.
- Consistency matters: adjustable closures make tie backs look “styled” every day.
Conclusion: a small DIY that changes the whole window
Good tie backs are one of those small details that make a room feel pulled together, even when the rest of the décor stays simple. Start with one window, pick a style that matches your curtain weight, and test placement before you commit to sewing a set.
If you want an easy next step, measure your curtain bundle today and make a single prototype tie back, once the length feels right, batch-make the rest so they match.
FAQ
How high should curtain tie backs be placed?
Many people like the lower third of the curtain height, but it depends on your window and fabric. If panels look pinched, drop the tie back a few inches and reassess in natural light.
What fabric works best for DIY curtain tie backs?
For a structured look, canvas, denim, or linen blends behave well. For softer drape, quilting cotton works, but it may need interfacing so it does not collapse or twist.
How do I keep fabric tie backs from slipping on heavy curtains?
Go wider, add interfacing, and choose a closure that locks (snaps or D-rings). A narrow ribbon on blackout curtains usually loses the fight by midday.
Can I make tie backs without drilling into the wall?
Yes. Use tie backs that wrap and close on themselves, like button-loop, snaps, or a D-ring strap. They are also easier to remove for washing.
Do tie backs damage curtains over time?
They can if you cinch too tightly or use rough hardware. A wider band spreads pressure and usually treats fabric more gently, especially on delicate sheers.
Are magnetic curtain tie backs safe?
They can be convenient, but safety depends on magnet size, strength, and who is in the home. If there are small children or pets, it is smarter to choose buttons, snaps, or D-rings.
How many tie backs do I need for a room?
Typically one per panel, so two for a standard window with two curtain panels. If you style curtains asymmetrically, you might only use one, but it tends to look best when it’s intentional across the room.
If you are trying to refresh a space fast and keep it budget-friendly, diy fabric curtain tie backs for window decor are a solid weekend project, and once you make one that fits your curtains, repeating the set goes quickly.